How to Merge Videos on iPhone [Only Three Steps]
If you are a videographer, it is pretty obvious that you have to deal with a lot of cutting, trimming, enhancing, etc. Hence, one should be able to do them all in one place to save time. For this, you can use the FilmoraGo app. It can help you do all of the above-mentioned editing parts along with others like merge video, add effects, etc., in one place.
As there can be many videos that you might need in your final cut, it is best to use the merge video function. It is a brilliant add-on that makes the merging process smooth.
If you want to learn how to merge the videos, refer to this comprehensive guide!
- Part1. The Basic Three Steps to Merge Videos on iPhone
- Part2. How to Make the Merged Video Smoother?
Part1. The Basic Three Steps to Merge Videos on iPhone
If you are an aspiring movie director, you must know that movie shots can be many, and it becomes difficult to manage them if you don’t have the right tools. FilmoraGo is a tool that can streamline your process of video making, no matter it includes merge video, adding special effects, trimming, or any other.
Here are the basic three steps to merge videos on iPhone!
Step 1. Import Multiple Videos
For importing multiple videos,
1. Get the FilmoraGo app on your iPhone.
every beautiful moment in life.
Install FilmoraGo Now!


2. Open the application on your phone, and you will see the privacy policy and terms of use screen. Click on Agree button.

3. Post this, you will see the home screen; tap on the + New Project button to start a new project.

4. The next screen will show you the media files, including videos, images, and others.
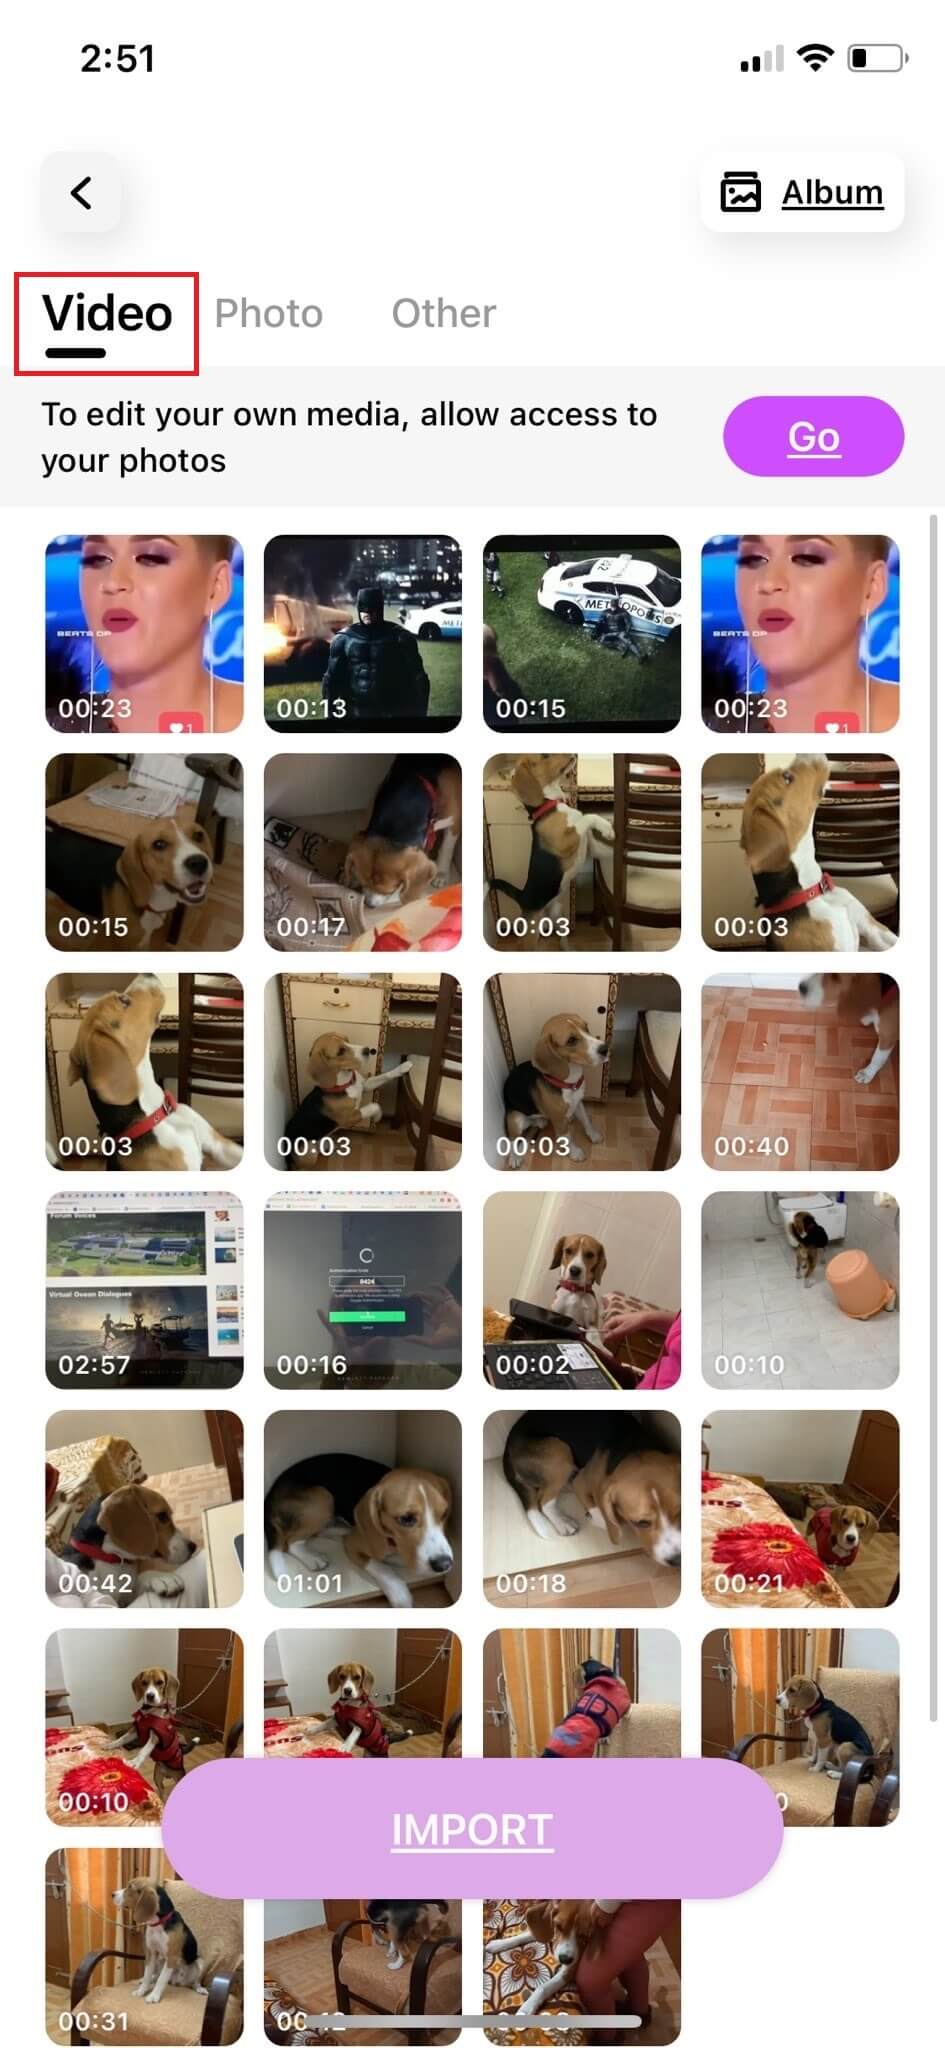
5. Tap on the Video option and choose the videos you want to merge. As shown in the image below, there are three videos that I selected. After selecting the videos, click on the Import option.

All three videos will be imported to the application.
Step 2. Adjust the order of the videos
After importing the videos,
1. You will see the videos on the next screen, as shown below. If you look closely, you will see two videos side by side in the image.
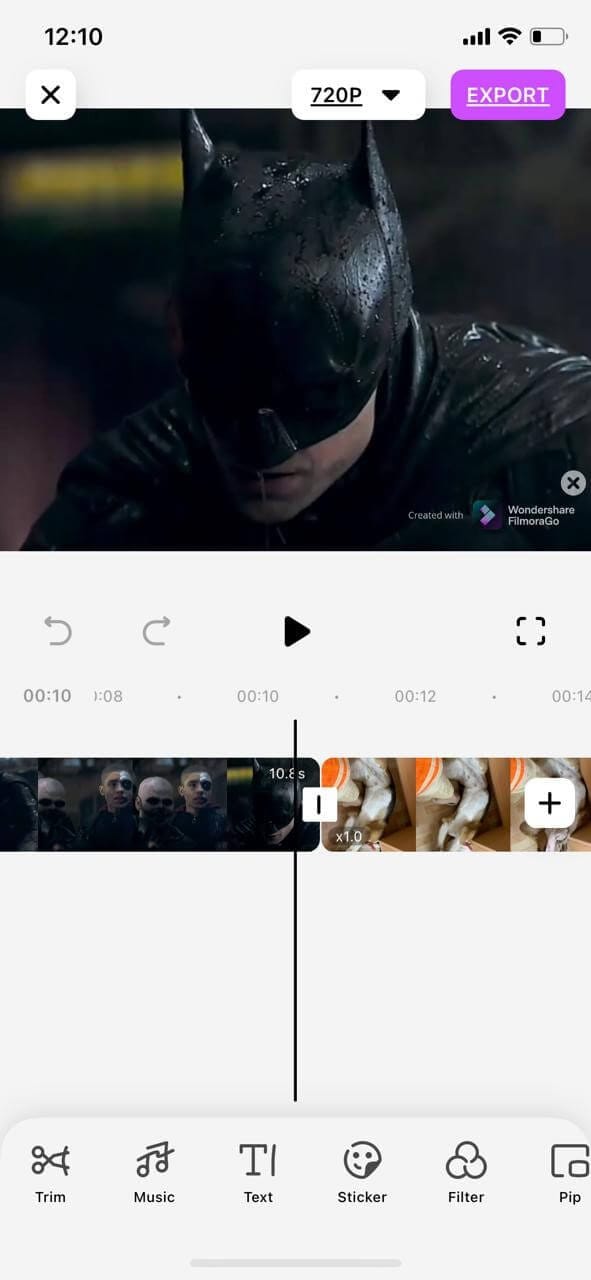
2. Now, long press on any of the videos, and it will show you all the videos with their respective time and speed.
If you see closely, the time of one video is 10.8 seconds, while that of the other one is 15.4 seconds. The speed of both the videos is the same at 1.
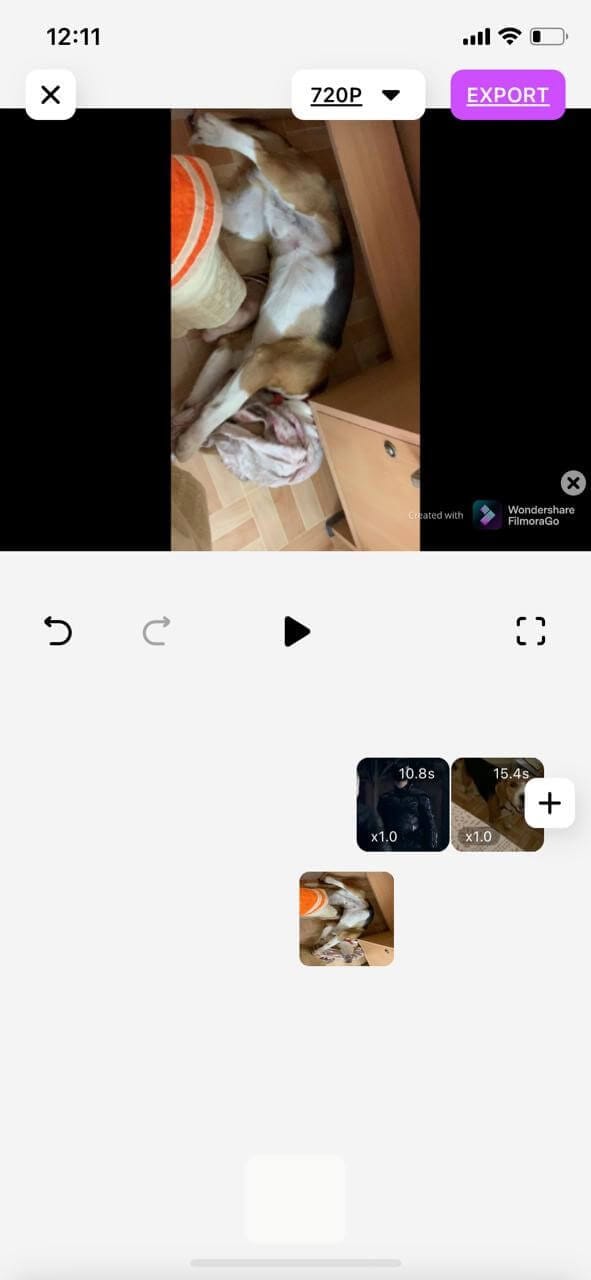
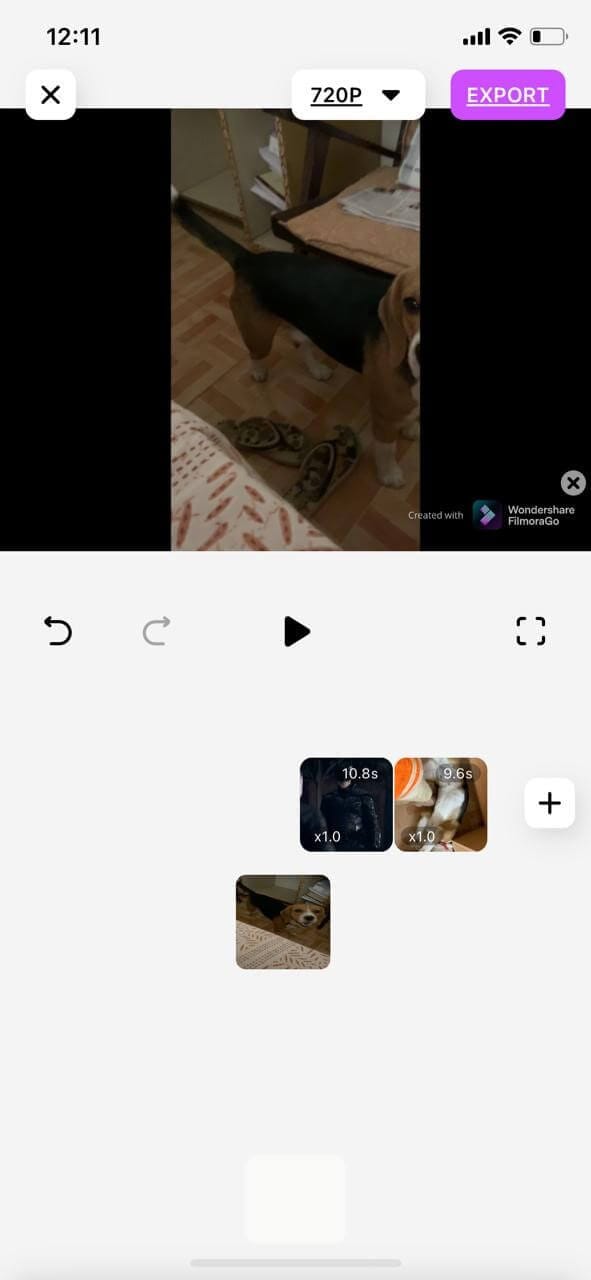
3. You can drag and drop these videos to change their arrangement or order. Here is one image to show you.
If you contrast the above image with the one below, you will see the change of order of the last and first video.
4. After you have made the arrangement of the videos to merge, you can do any type of editing if you want to. There are many functions that you can use in the app, such as Trim, to cut the video from a particular point, add music or text, and many others.
These are just to further enhance before merging the videos. Check out the images below to know about more functions that you can use.

Step 3: Export to Merge Videos on iPhone
Once you are done with the rearrangement of the videos and editing, click on the Export button to finally merge videos on iPhone and save it.
The export button will be on the top right corner of the app interface. Here is an image!

You may also like: MP4 Cutter: How to cut MP4 files on iPhone
Part2. How to Make the Merged Video Smoother?
Now, it is imperative that when you merge video, there will be a sudden shift in between the videos (like during transition from one video to another).
It will not be smooth; you have to make it if you are planning to post it on your social media account. To make it smooth, you don’t need any special tool; you can do it in FilmoraGo only.
Step 1. Change the Duration and Speed of the Each Video
One of the key ways to make your merged videos smooth is to change the speed and duration. For example, some parts of the videos might be too slow; you can change their speed to match with the other parts for a smooth cut.
Here are the steps to change the speed of the video!
1. Import the merged video and tap on the Trim option to open up further options.
![]()
2. The Trim option will open up further options like Opacity, Fade, Speed, Reverse, Freeze, etc.
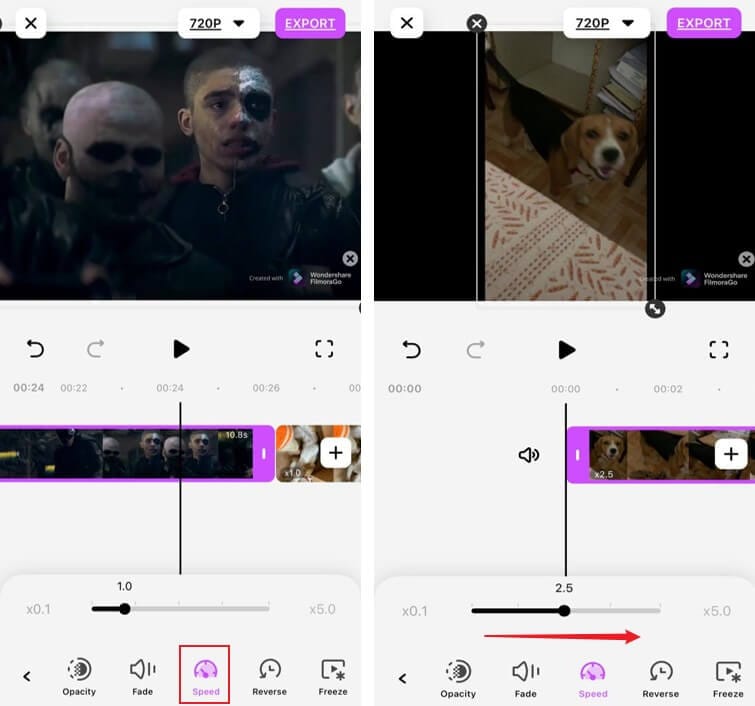
3. To change the speed of the clip, tap on any part of the video and then on the Speed option at the bottom. Now, adjust the speed as per your need.
For example, in the first image, I have kept the speed of the video at one, whereas, in the second image, the speed of the video is at 2.5.
Step 2. Add Transition Effects at the Intersection of Videos
The second way to keep your merged videos smooth is by adding transitions and animations to the videos. Here are the steps to do it.
1. Import the video and tap on Trim, and it will open up more options.
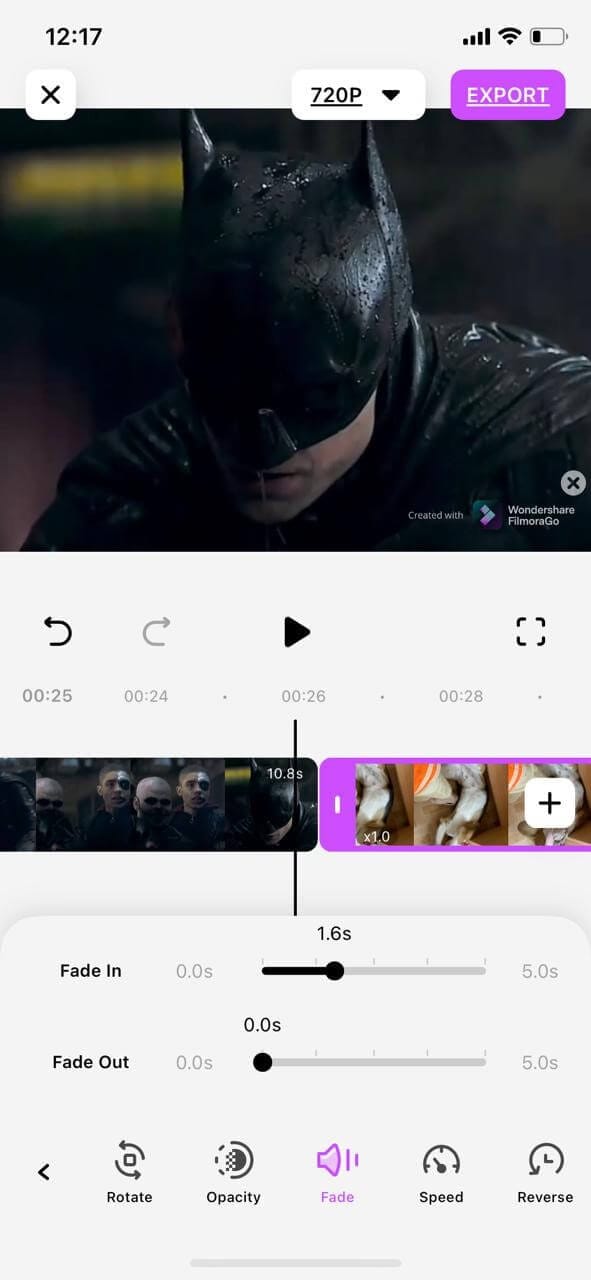
2. Look for the Fade option among the choices shown at the bottom and tap on it. Here, you can adjust the fade-in and fade-out time to ensure that the video goes in and comes out smoother than abruptly.
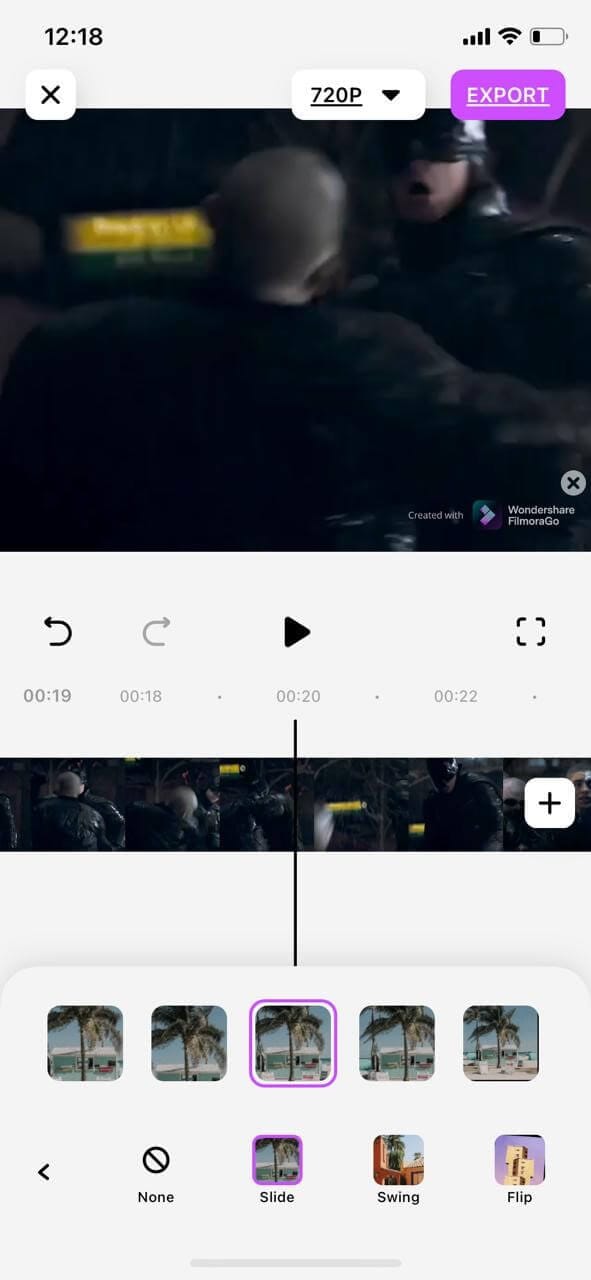
3. To make the video better, you can also add animations to it. You can choose from the options shown in the image below. You can also vary the Opacity if you need to.
4. After you are done with the merge video and video smoothening process, you can tap on Export to save the video.
This is all about how to merge videos on iPhone and to smoothen them further.
You may also like: How to make an Instagram Video on FilmoraGo
Conclusion
The process of merging videos on iPhone is pretty easy as you just have to import the videos, and you are done. After the merge video process, you can also edit it to add effects, text, music, and many other things to further beautify it.
You can use the fade, opacity, and animation options to make it more immersive and smooth.
You may also like: How to get a beauty filter on iPhone video

