Montage Making: How to Make a Video/Photo Montage
Joining together a series of photos is considered a photo montage. Editors do the same with videos these days. It is a process that involves cutting, rearranging, gluing, and overlapping two or more photographs with a new background template to form a new image.
Such collages of photos or videos give a rich look. With several editing apps, it has become easy for users to put all pictures together and share those appealing photos with the audience.
With such amazing montage apps, users can change the background of the images and help you include stylish photo frames.
If you want to create a photo or video montage, install any photo montage app on your smartphone. This blog series will help you discover the two best applications to make cool photo and video montage on your iPhone and Android smartphone.
- Part1. Steps of Make a Video Montage Using FilmoraGo on iPhone
- Part2. Steps to Make a Montage of Photos using FaceApp on Android
Part1. Steps of Make a Video Montage Using FilmoraGo App on iPhone
Wondershare FilmoraGo is the go-to video editor to make montage videos that can also enhance your creativity and imagination. It can work beyond your expectations, working on every tiny detail of the video component, creating a photo and video montage with this video editor. Some of the incredible features of Wondershare FilmoraGo include:
- It has a simple interface with practical video editing features
- Free to download and Free to use
- No Ads
- The application of filters, themes, and effects is simple
- Crop, trim, collage, and other effects are seamless
- 10000+ copyright-free music library
- Amazing video editing effects like ar camera, video beautification, double-take,etc.
- Supports both iOS and Android users
If you want to create a montage video on iPhone, follow the below easy steps.
every beautiful moment in life.
Install FilmoraGo Now!


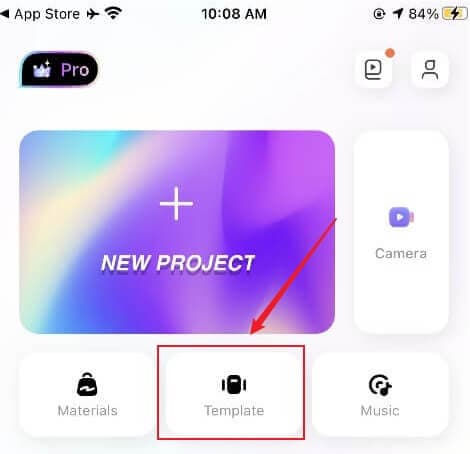
Step No. 1: Access the “FilmoraGo” App and Select “Template”
Launch the FilmoraGo app on your iPhone and once the interface is in front of you, press the “Template” option.
Step No. 2: Click “Hot” Feature and Make the Video
Upon clicking the “Template” option, you will find multiple features on the interface such as Hot, Music Beats, Food, Sports and Fitness.
Click on the “Hot” feature and select the desired template of your choice. Upon clicking the required template, the montage effect video will automatically be played on the screen.
In case, you are not satisfied with the video template, swipe to select from other template options.
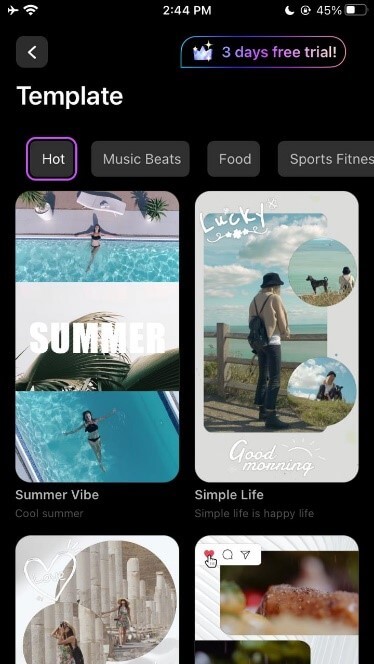
If you like a template, press “Make Video” option to proceed to the next step. In the below example, we have selected travel template.

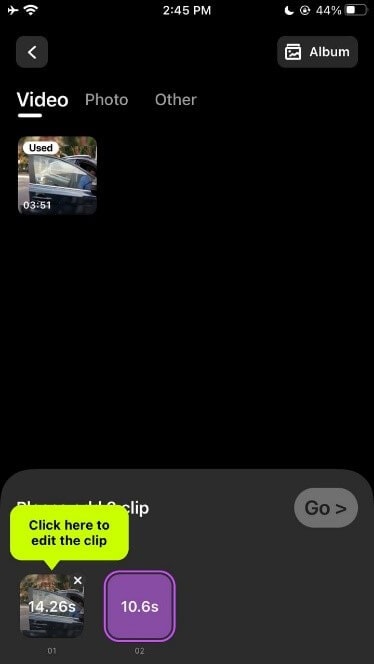
Step No. 3: Select the Desired Videos to Create a Montage
After hitting the “Make Video” option, Wondershare FilmoraGo will seek your opinion if the application can access the photos and videos. If you have already permitted before, the option won’t show up again and directly take you to the album where your photos and videos are saved.
After allowing the access, you will find saved videos in your iPhone’s album and the bottom part will guide you how many videos you can create a collage of using this template and how long each video will can last.
In this step, choose the videos in sequence. Please note that all montage video templates require different video quantities and duration. In the below example, we have selected only two clips.
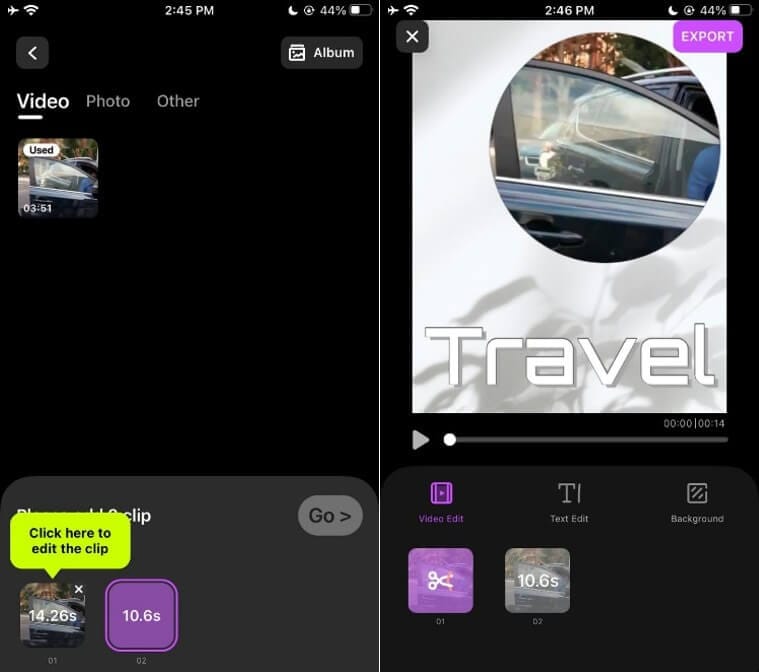
Step No. 4: Click “Go” Button and Add Required Effects and Include Text
After selecting the templates and videos, select “Go” and the video will be automatically displayed on the software editor. You can add effects such as video editing features, including text, and background in the clips, if required by clicking on the clip to edit it.
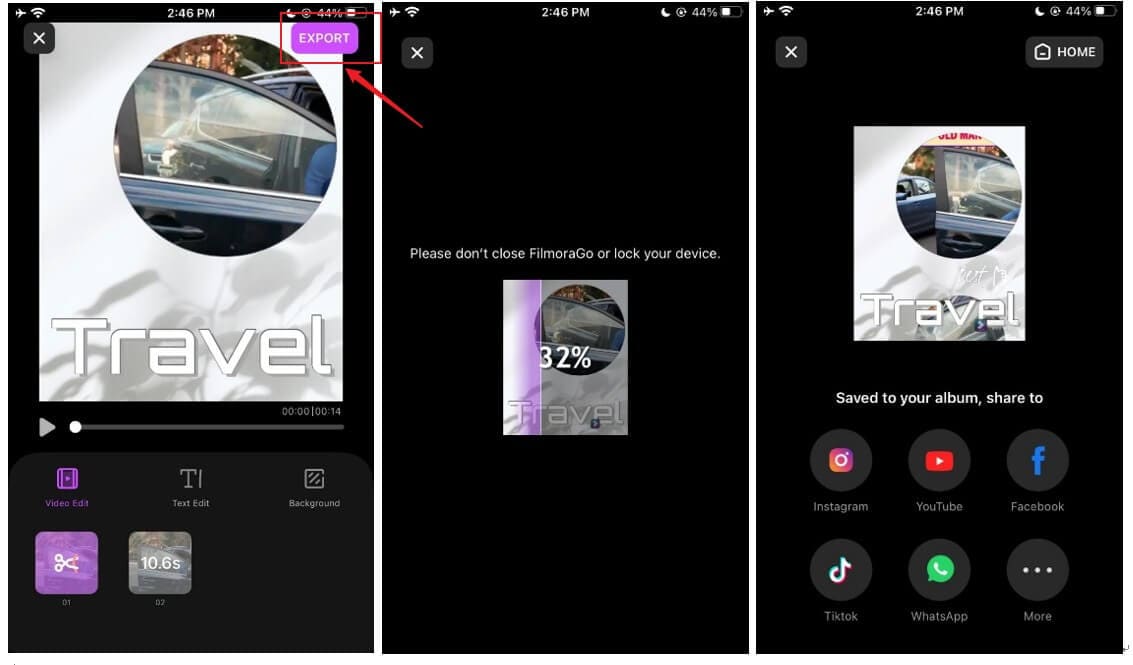
Step No. 5: Export the Video
Once you have included all the effects and features, preview the edited montage video on the application. If the result satisfies you, hit the “Export” button which is at the top right corner.
The complete video will be saved in your album which you can share on your social media platforms too as soon as you edit it. Make sure that you do not close the app or your device before 100% of the video is exported as the process may take a few minutes.
You may also like: Montage Template: Easily make a video montage on FilmoraGo [with pictures]
Part2. Steps to Make a Montage of Photos using FaceApp on Android
FaceApp is one of the most amazing photo montage apps that includes unique features such as photo background changing options, cutouts, stitching, blurring, skin color or hair color changing tool, and much more.
This application can give a professional touch to your photos, even altering the background template of your photos. The advanced software tool has converted over 500 million user’s pictures into a modeling portrait.
If you require an Instagram-worthy edit, download this free app on your smartphone today and use the fantastic AI filters, effects, backgrounds, templates, themes and other tools to create a photorealistic edit in just a click.
The app supports both iOS and Android users providing over 60 highly photorealistic filters to editors. Below we have explained the steps of creating an image montage on an Android phone.
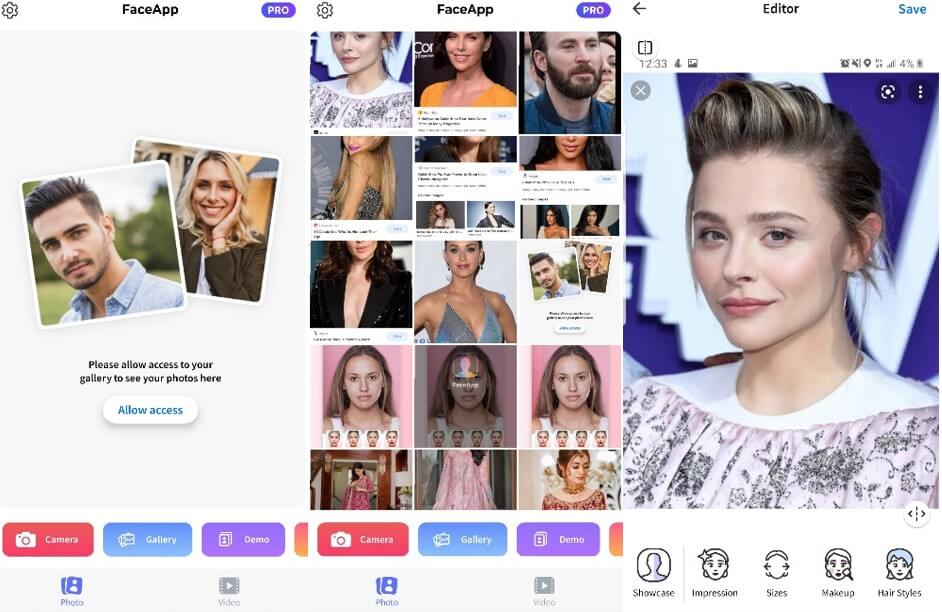
Step No. 1: Access the FaceApp Software on Your Phone and Select the Image from Gallery
Firstly, launch the FaceApp on your Android phone. The app’s interface will appear in front of you from where you will select a photo from the “Gallery”.
Upon choosing a photo, the image will be displayed on your screen. The process of creating a montage photo will begin in the next step.
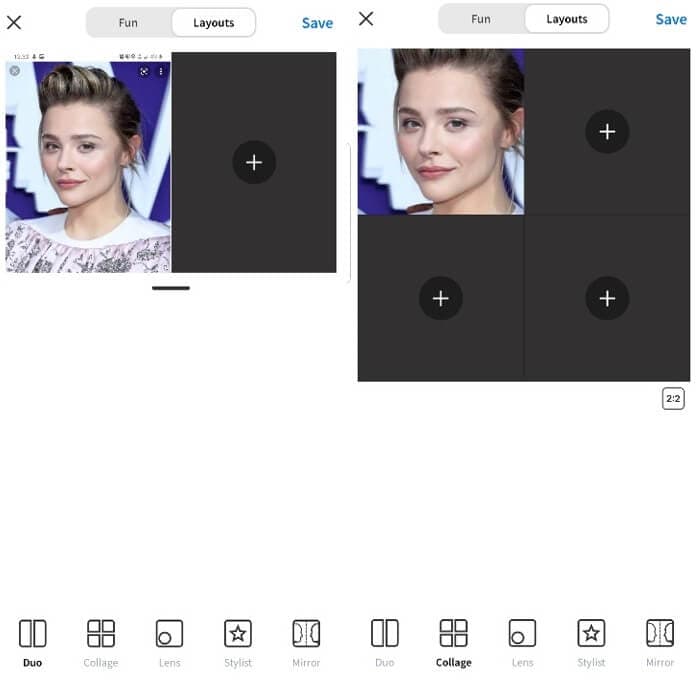
Step No. 2: Go to the Layout tab and Select Collage
Users should keep in mind that the app has several features for editing, layout, and fun; therefore, to make a collage, they have to select the most suitable option i.e. layout. Go to the “Layout” by clicking on the “Showcase” option.
Step No. 3: Press “+” Symbol, Edit the Photo and Include it in the Collage
Upon clicking the “+” sign, edit the photo as required. You will find several features such as fun, smiles, impression, hair colors, and others to edit the image. Include effects based on your requirement, and the photo will appear in the chosen layout.
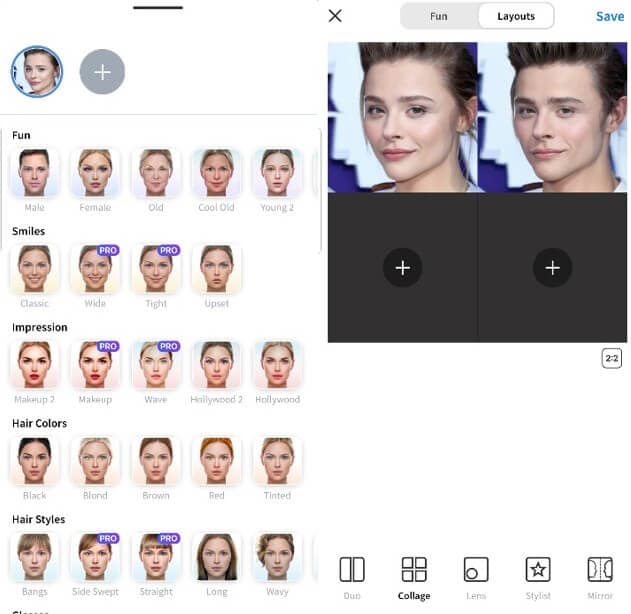
Step No. 4: Repeat the Steps
As your layout would have space for 2 more photos – because we have selected a college – you have to repeat the same steps of editing the image and include the remaining photos.

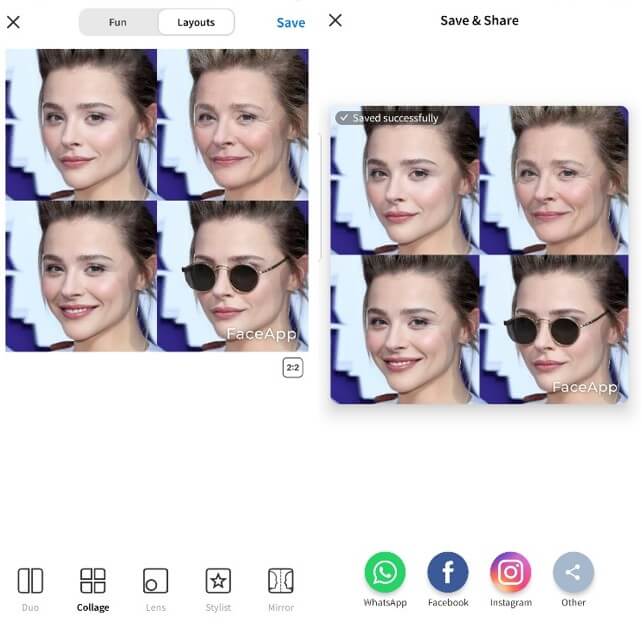
Step No. 5: Save the Photo Montage
After including all the edited photos in the collage, your image montage would be completed using FaceApp. Press “Save” at the top right corner and the photo will be in your phone’s gallery.
You can also share it on the spot after editing it on any of your social media platforms.
You may also like: Reverse Video: How to Play Video Backwards on Your Phone
Final Word
We have discussed two software tools for montage photos and videos. However, Wondershare FilmoraGo is one of the most selected tools by seasoned editors.
Expert users recommend using this application for creating montage photos and videos instantly. Download the FilmoraGo app today and follow the aforementioned to amaze your audience!
You may also like: How to Split a Video into Multiple Parts for Free on iPhone/iPad

