- Cut, trim, split, and merge video clips easily.
- Plentiful customizable text styles and animations.
- VA wide range of transitions and visual effects to enhance videos.
How to Reverse Video on iMovie 2025[Mac/iPhone]
Reversed videos are an established special effect with several purposes. It can describe the audience with a fast, slow-motion, or instant replay. It can amaze and intrigue them, playing backward.

According to several seasoned social media influencers, reversed video clips have had a history of engaging views.
Many Vloggers and artists use this technique to give a more artistic and creative tone to their videos. You should play the video backward.
Usually, such editors use this technique to give more of a comical effect to the action of the video.
To reverse a video, users require a suitable software tool. In this blog series, we will discuss steps that one can follow to reverse a video using iMovie and one of the highly recommended tools, Wondershare Filmora.
every beautiful moment in life.
Install Filmora for Mobile (formerly FilmoraGo) Now!


- Part 1: How to Reverse Video on iMovie
- Part 2: A Better Choice to Reverse and Change Speed of the Videos - Preferred iMovie Alternative
Part 1: How to Reverse Video on iMovie
1.1 Steps to Reverse Video on iMovie [For Mac users]
iMovie is one of the most used video editors among Mac users. It is suitable for both beginner and seasoned social media influencers.
One can play the downloaded YouTube videos in reverse order and save them as a new clip as a whole. To play videos backward is simple in iMovie.
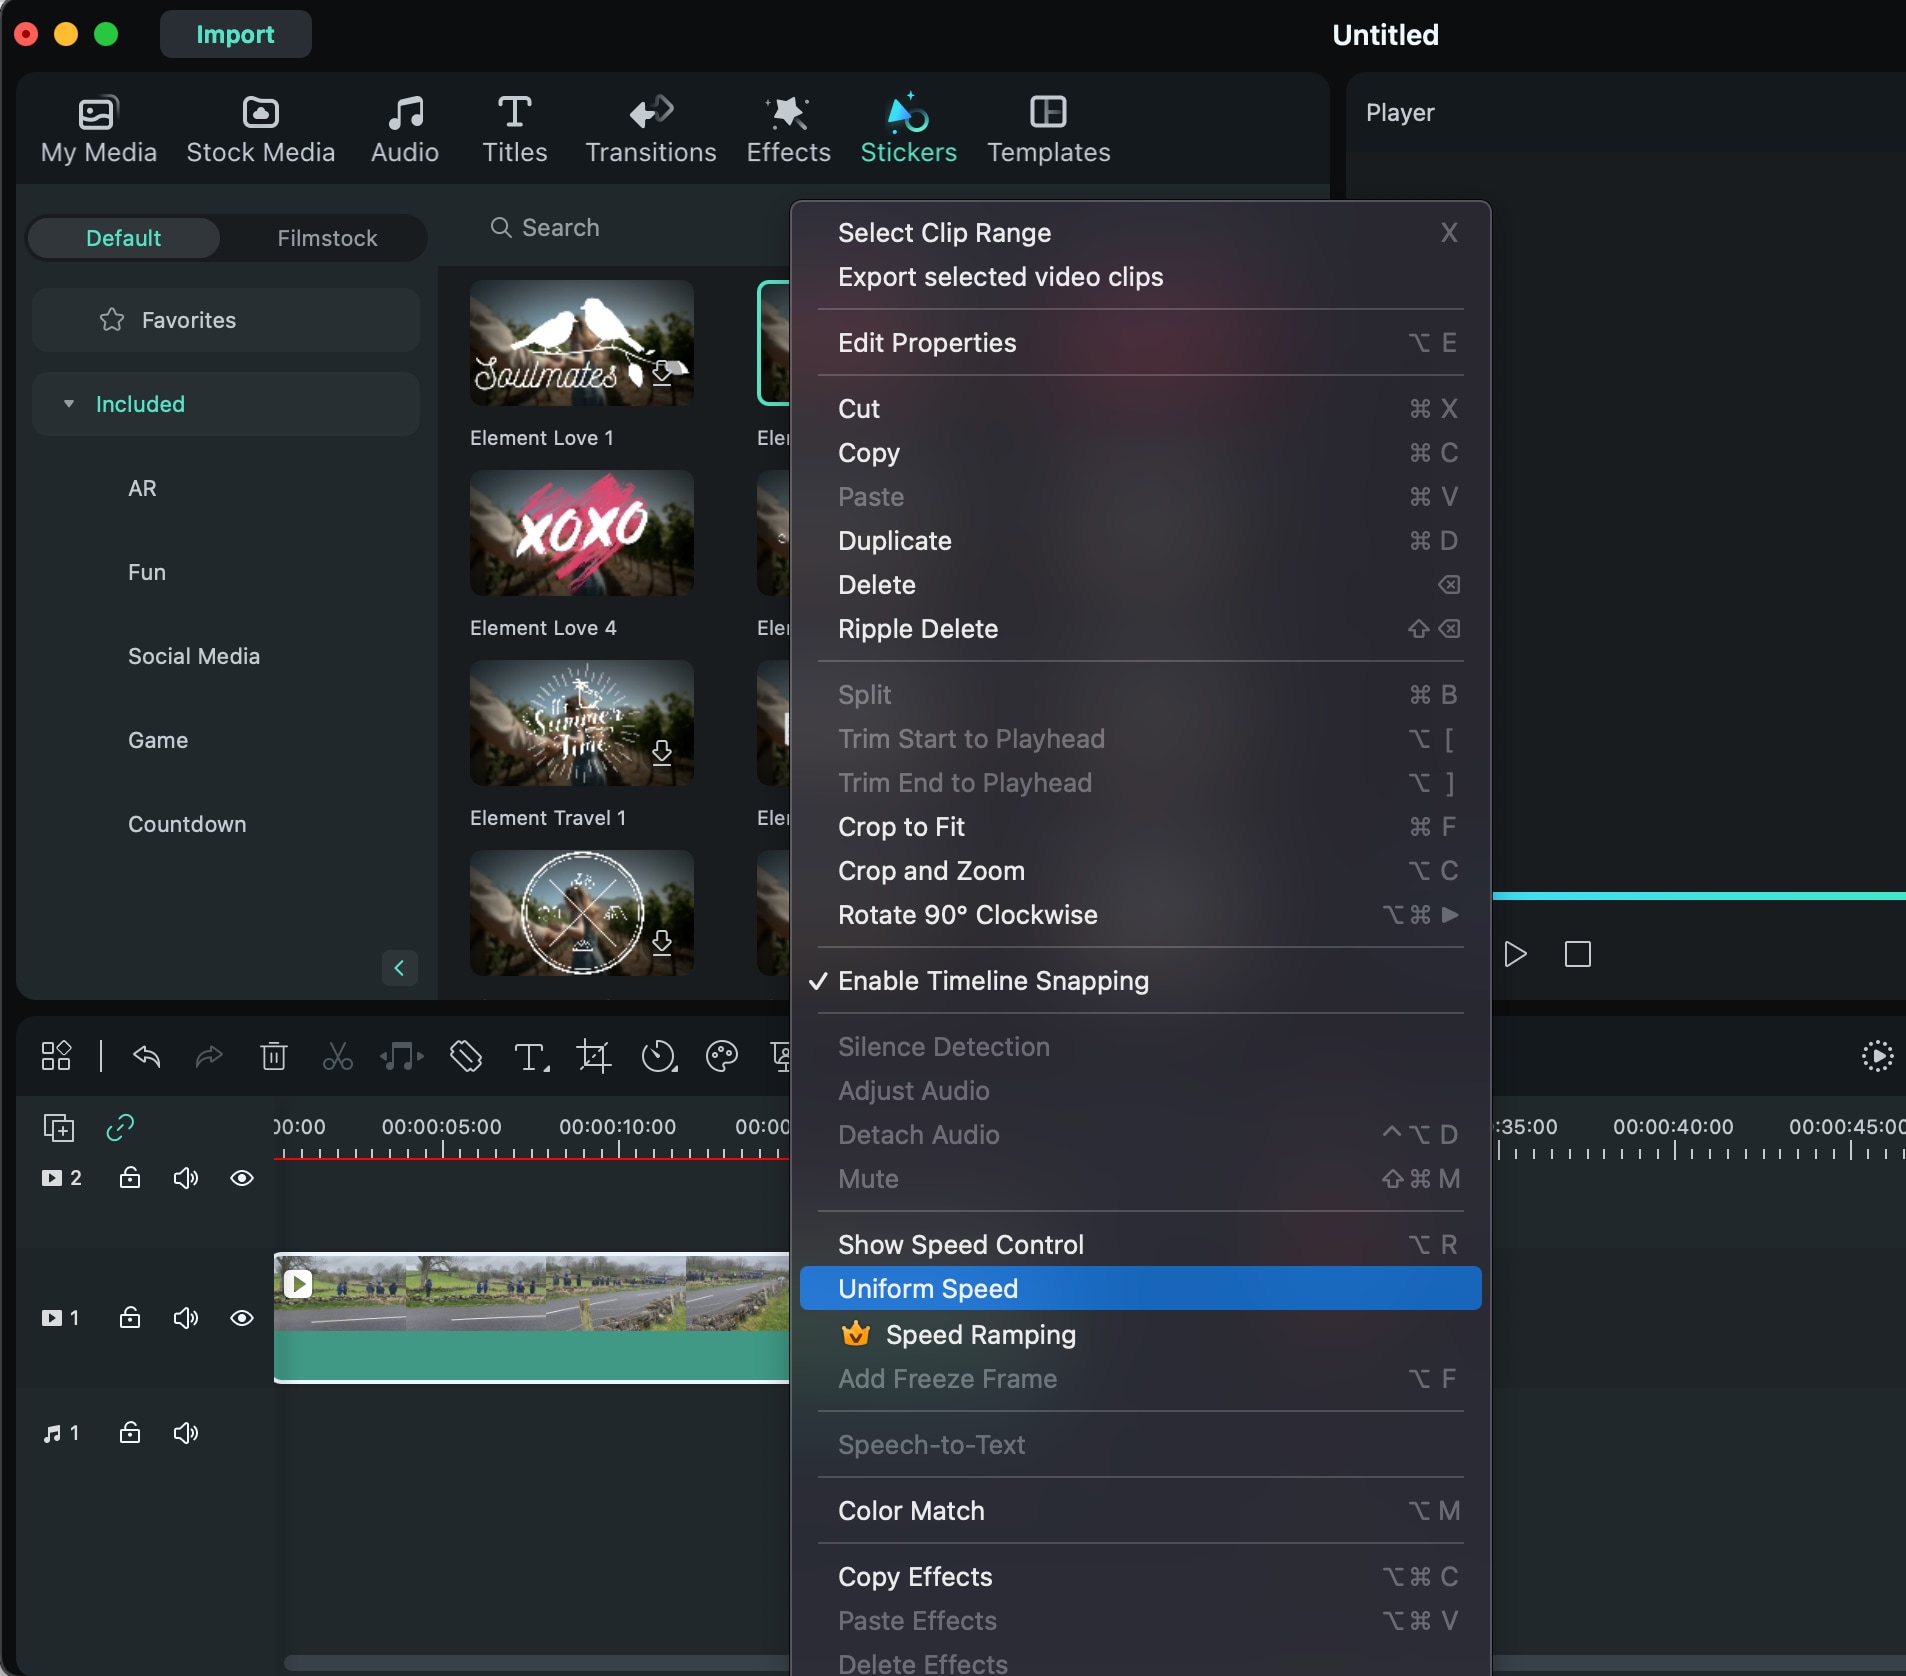
You can select the target media clip in the timeline and then select the reverse option.
Users can edit both audio and videos on the iMovie, creatively enhancing videos online. The exported edited video can be shared on various platforms and other Apple devices.
However, iMovie has limits and lacks supporting common video formats such as AVI format. Therefore, one has to select only from the given options.
Step No. 1: Add Video to iMovie
Launch iMovie on your Mac and begin a project. Drag a video from your media collection onto the timeline. Click the video clip to reverse in the timeline. Highlight the clip to access editing options.
Step No. 2: Open Speed Controls
Click the “Speed” icon above the video preview window to adjust speed. Select the clip to see its speed settings.

Step No. 3: Reverse Video
Adjust speed in the Speed pop-up menu. Tick the Reverse box to reverse the video. The timeline clip will include a speed slider and a rabbit or turtle symbol for fast or slow.
Step No. 4: Adjust Speed
After reversing the clip, use the timeline "speed slider" to alter its speed. Moving the slider right slows the video while moving it left speeds it up. Reversing and speeding up a movie simultaneously shortens the timeframe.

Step No. 5: Final Adjustments and Export
After reversing and adjusting the video, click "File" and pick "Share" to save or share it on multiple platforms.
Note: Changing the clip speed will deactivate focus on a Cinematic mode video, but you may still modify the depth of field.
1.2 Steps to Reverse Video on iMovie [For iOS users]
iMovie is a popular iOS video editor owing to its ease of use and pre-installation. It may surprise you that iMovie for iOS does not enable reversing video clips on iPhones and iPads. Only Mac iMovie can reverse films.
However, iMovie for iOS has several helpful features, including:
- Clips organization and merger: Place segments on the timeline for a smooth video.
- Extra creative effects: Use animated titles, background music, filters, and transitions to improve your video.
- Using templates: Select a template for lessons, vlogs, or event videos.
- Changing playback speed: While reversing isn't possible on iOS, you can slow or speed up your video.
Alternative iOS Video Reversal Options
If your project requires video reversal, use third-party software. Filmora for Mobile is an excellent one-tap video reverser. Refer to part 2.3 to learn more!
Part 2: A Better Choice to Reverse and Change Speed of the Videos - Preferred iMovie Alternative
While iMovie is a good and most used software tool for Mac users to reverse videos, the interface can be a little complex for beginner-level video editors.
They seek applications with a simple and easy-to-use interface. Seasoned editors suggest using Wondershare Filmora to obtain the reverse video effect on a simple interface.
Filmora's straightforward interface and strong tools let you reverse and speed up Windows, Mac, or iOS films.
Filmora Key Features:
- Filmora's easy-to-use interface makes video editing easy for novices and pros.
- The program lets you reverse videos with one click for seamless playing.
- You may quickly slow or speed up your video.
- Filmora supports motion graphics, green-screen effects, and more.
- Filmora works on Windows, Mac, and iOS, making it a flexible editing tool.


2.1 How to use iMovie Alternative to Reverse Video [For Win]
If you're using Windows, Filmora makes it very simple to reverse a video. Here are the steps:
Step 1. Import video.
Launch "Filmora" and start a "New Project." In the Media Library, drag the video clip you wish to reverse to the timeline.
Step 2. Access speed controls.
Open the "Video Edit" Panel by clicking the timeline clip. Navigate to the "Speed" tab. Check "Reverse Speed" in the Speed tab to play back in reverse. Use the top toolbar Speed Icon instead.

Step 3. Select Reverse.
Click the icon and choose "Reverse" from the list.

Step 4. Adjust Speed (Optional)
After reversing, use the "Speed Slider" to adjust the video speed. Slide the slider left or right to slow or speed up the video.
Step 5. Export Video.
Click "Export" to save or share the reversed video.
2.2 How to use iMovie Alternative to Reverse Video [For Mac]
On a Mac, Filmora provides two methods to reverse a video. This is how you do it:
Create a new project.
Open Filmora and choose "Create New Project." Import the video you want to reverse into the Media Library.
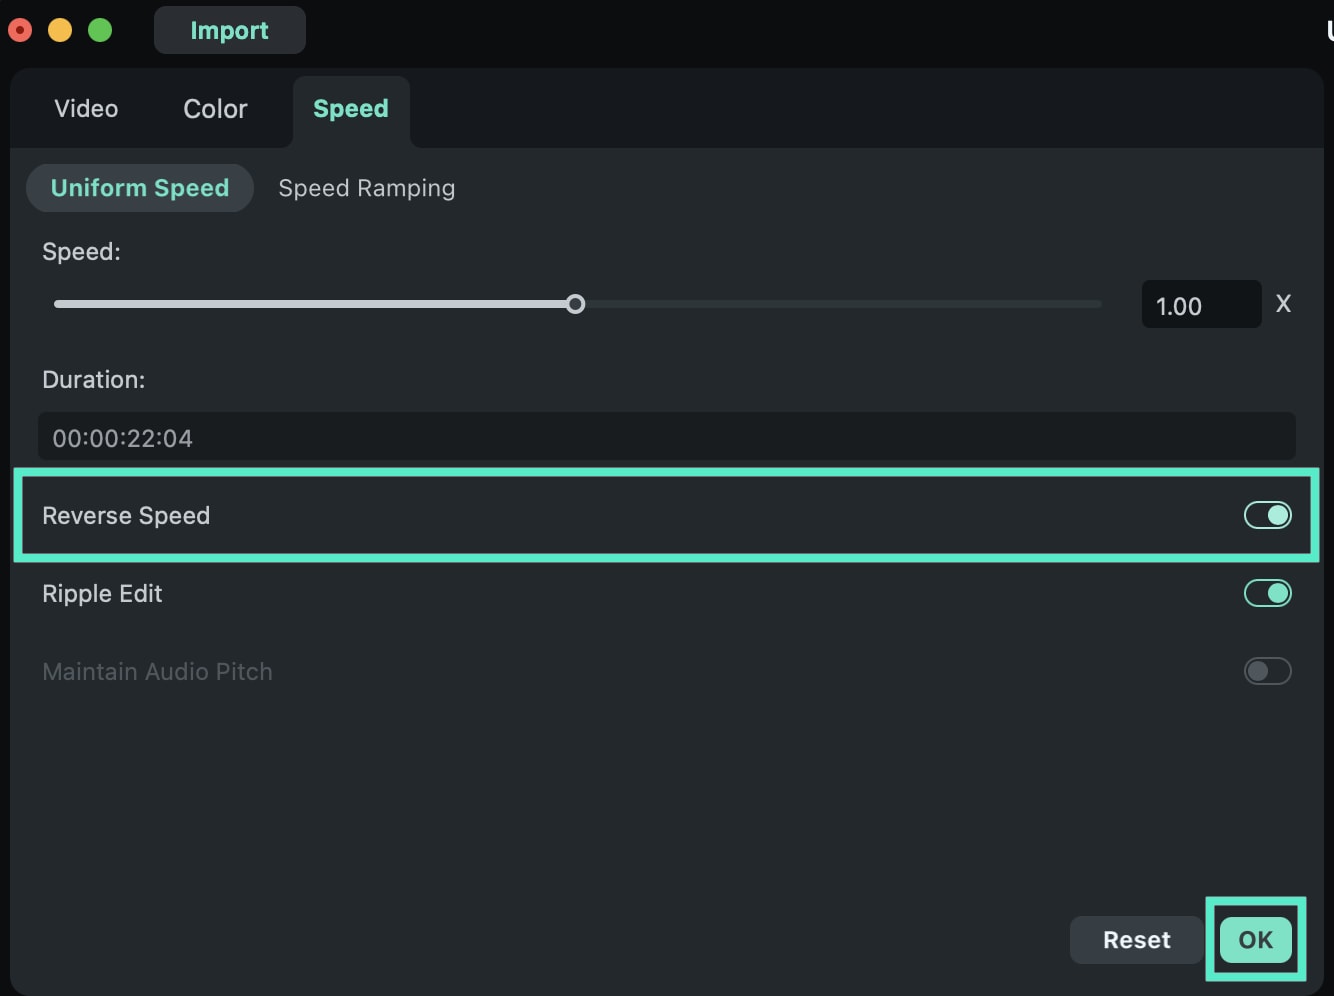
Method 1: Use uniform speed.
Step 1. Right-click the video clip in the timeline and choose "Uniform Speed."
Step 2. In the "Speed" Panel, choose the "Reverse Speed" option and click "OK" to apply the effect.
Method 2: Use the Speed Panel
Step 1. Double-click a video clip in the timeline to access the "Speed" Panel.
Step 2. Under the "Speed" menu, choose the "Reverse Speed" option to reverse the video.
Step 3. After applying, use the speed slider to alter the speed as desired; the adjustments will be applied to the reversed video.
Step 4. Once your video has been inverted and altered, choose "Export" to store or share it.
2.3 How to use iMovie Alternative to Reverse Video [For iOS]
Filmora for iOS is a great mobile editing alternative to iMovie since you can reverse your film with a touch. Filmora's one-tap reverse tool makes it simple to add a distinctive twist to your movie, whether you're rewinding or playing backward. Filmora on your phone can reverse a video:
Step 1. Add a video to Filmora's workspace.
Launch FilmoraGo on your iPhone or iPad and hit "+ New Project" on the homepage Quick Access panel to start a new project. Select the video to reverse by tapping it. Import to add the video to the timeline. You may access an existing project from the Project Management panel for draft or cloud-stored videos.
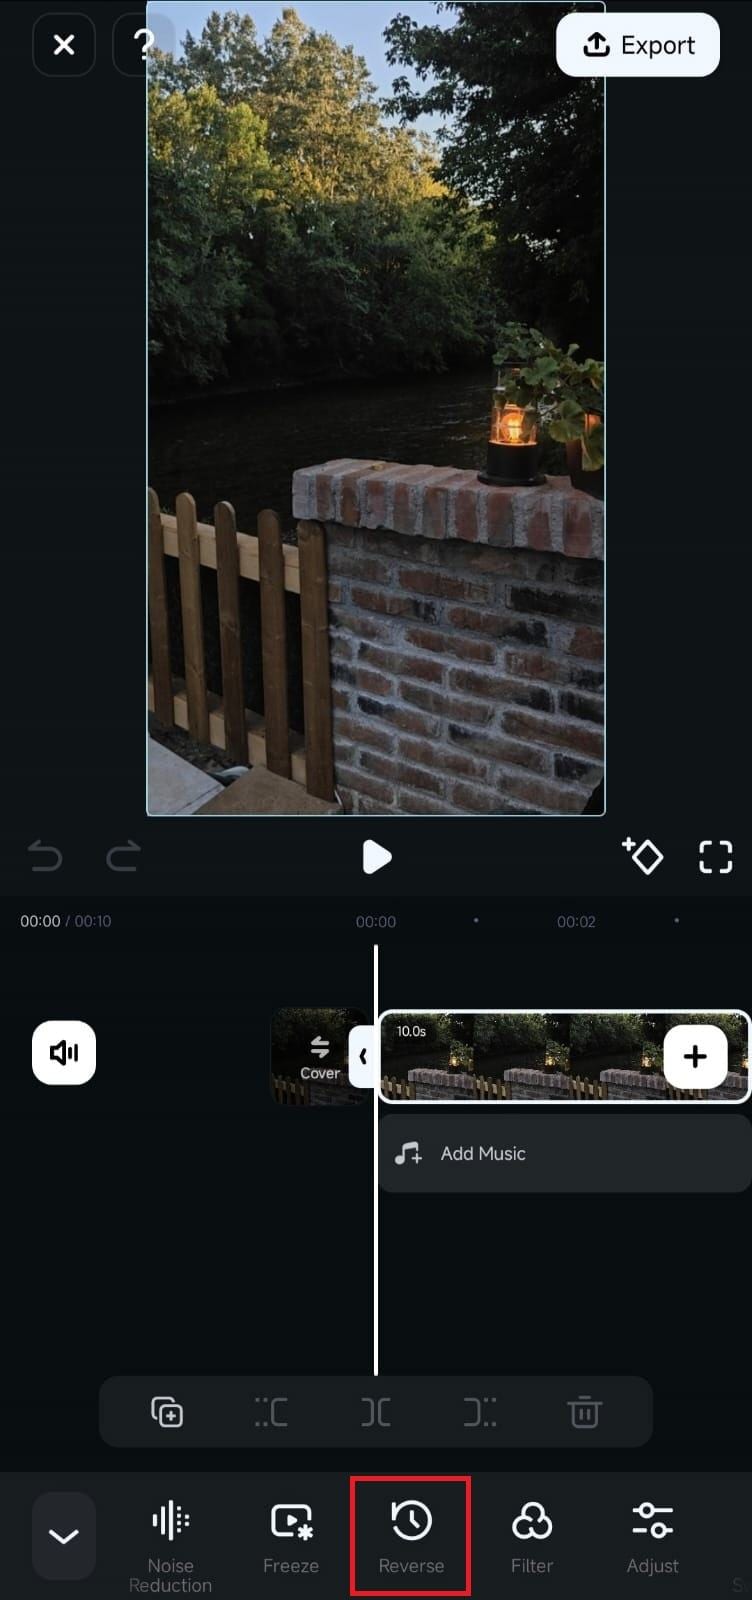
Step 2. Reverse Effect.
Tap the video in the timeline, select it, then press the "Trim" button at the bottom. Open the Trim menu to locate "Reverse" in the toolbar. Tap "Reverse" to have Filmora play your video backward.
Step 3. Preview and export.
After applying the reverse effect, test the video's playback. You may modify or export your video for social media or other sites.
FAQs
1. Can I reverse only a part of the video?
Yes, you can only reverse a portion of the video. Use the editing tool to divide the clip, then apply the reverse effect to the desired area. Both iMovie and Filmora let you split and reverse portions, giving you complete editing freedom.
2. Can I reverse multiple clips at once?
Yes, Filmora can reverse several clips. Following the addition of the clips to the timeline, you may pick and reverse them all at once. IMovie cannot reverse numerous clips simultaneously; each must be reversed separately.
3. Will reversing a video affect its audio?
Reversing iMovie and Filmora videos affects audio. The pitch may shift when the video is reversed, distorting the audio. To avoid audio distortion, choose Preserve Pitch in both applications.
4. Is it possible to preview the reversed video before exporting?
Yes, you may observe the inverted video before exporting. Real-time preview lets you rewind in iMovie and Filmora. Before exporting the project, you may make any required tweaks to ensure the reversed effect appears perfect.
5. Can I add effects to a reversed video?
Absolutely! In iMovie and Filmora, you may apply effects to reversed videos. Use filters, transitions, text, and other visual effects to enhance reversed film. This versatility enables you to use creative and reverse editing for professional outcomes.
6. What if I make a mistake while reversing?
Both iMovie and Filmora enable you to reverse video reversals. Undo or use the keyboard shortcut to return to the previous state. This lets you explore without risking irreparable damage.
Final Word
Playing a video clip in reverse can be a virtually appealing effect on your footage. Such videos can put a stamp on your project as an editor.
Whether you are making an action-packed video or a music clip, such editors help you play with the video editing software tool. However, recording videos can be the beginning of the creative process, while editing can get you the most rewards.
You can add reverse video effects in your clips using effective software tools such as iMovie or Wondershare Filmora.
Using a simple tool like the latter, Filmora can help you seamlessly reverse the required video at any speed and in any format. Download the app today and enjoy editing the video!