How to Add Filters to Video on FilmoraGo
In former style photography, editors used a filter which used to be in the form of a glass. It was a specialized piece of glass affixed to the lens to adjust and improve the photograph. Today, the term “filter” is a small program or category inside an editing application.
It is one of the essential aspects for social media influencers to include their videos. Assisting editors in managing their footage, such video filters enhance the whole quality of the video.
When people desire to add filters to their videos, they usually want to include the effect from the dropdown menu in a video editing software tool. Editors can use a myriad of filters in their photos, giving their photographs fantastic results that can amaze the audience.
Wondershare FilmoraGo is one such software tool that supports over 50 filters and effects that enthusiasts can include in their photos and videos. This blog series will cover the video filters one can use in the application and the steps to use them in the tool.
What Video Filters Can You Use in Wondershare FilmoraGo?
If you are already tired of ordinary or mainstream video effects and filters and want something special and different, download the FilmoraGo application and add some of the best video filters in your clips.
We have discussed a list of video filters that you can make use of in your footage. You will find a few filters’ categories under which there will be more sub-categories of filters.
1. PRESET
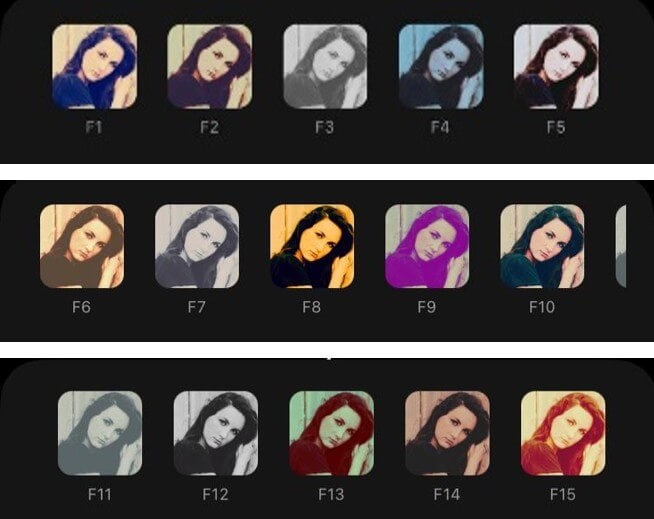
2. Game
3. Retro
4. Anime

5. Faux Film

6. Cinematic
You may also like: Make your Videos Look Cinematic with One-tap on FilmoraGo iOS
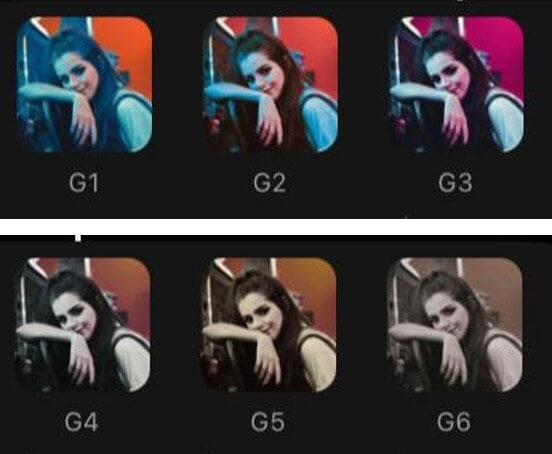
7. Cyberpunk

You may also like: Easily make a cyberpunk style video on FilmoraGo iOS
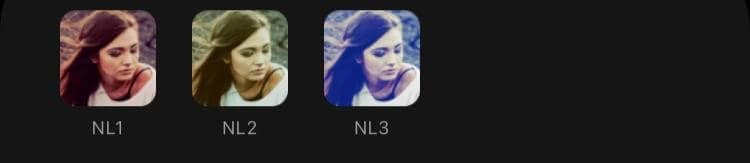
8. Night Life
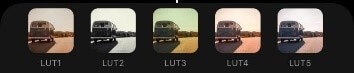
9. 3D LUT
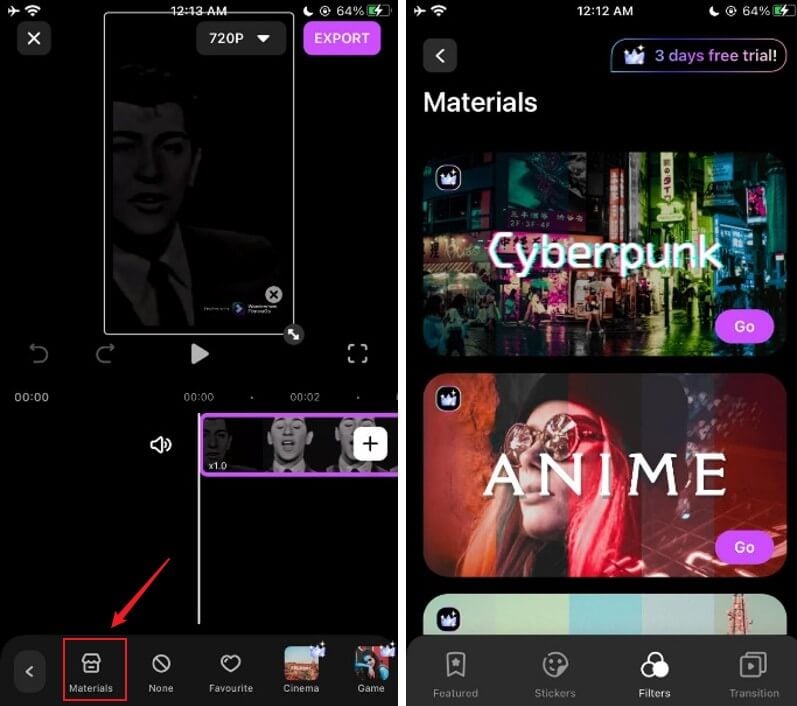
To explore more exciting filters, editors can click on the Materials option to view a variety of professional filters. However, the majority of them may be displayed on the window.
You may also like: Three Ways to add video filters for free on iPhone
Steps of Adding Filters for Your Video in Wondershare FilmoraGo
Those individuals who wish to stand out using popular or advanced filter effects such as cyberpunk or 3D LUT should read the below steps. But first, you all must install the latest version of the application on your iOS phone.
every beautiful moment in life.
Install FilmoraGo Now!


Step No. 1: Add the Video to the Application
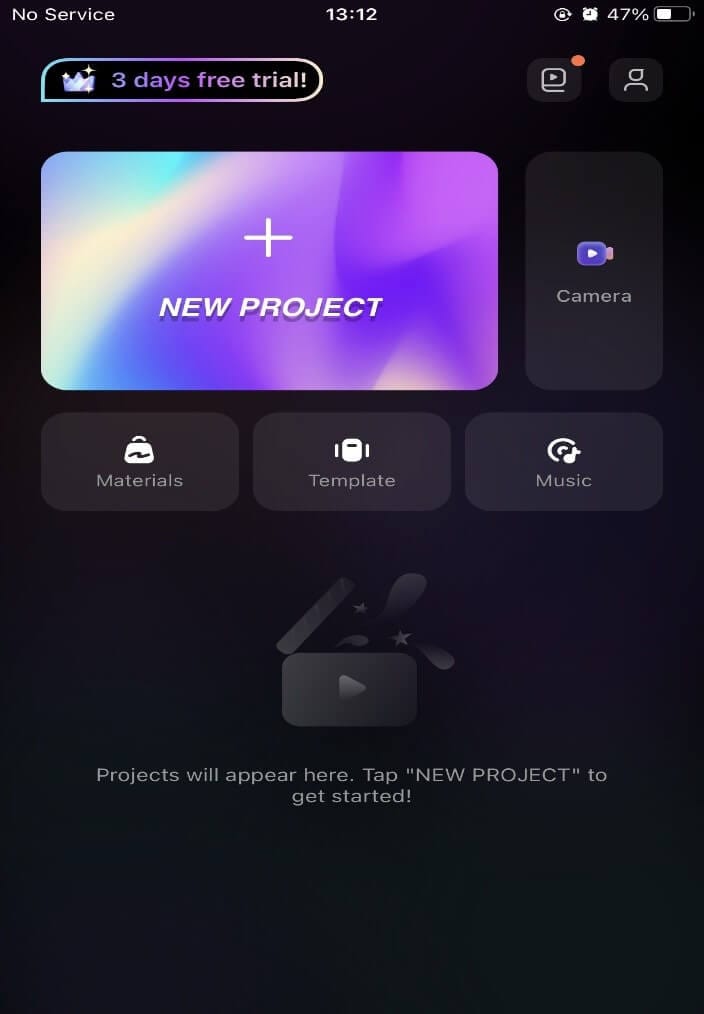
After downloading the Wondershare FilmoraGo app on your iOS device, it is time to access it on your phone. Once you launch the app on your phone, hit the “New Project” option with a “+” sign, and import the video.
Soon after importing the video, it will appear on FilmoraGo’s interface where you will find several options to edit the video.
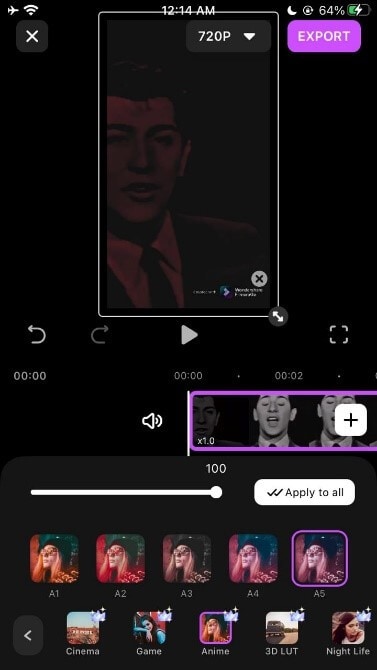
Step No. 2: Tap the “Filter” Icon and Apply the Desired Filter
Choose from any of the filters discussed above and apply them to your clip(s). On the interface, you will find a three circles’ icon that represents the filters. Upon clicking the icon, you will be able to view all the mentioned filters.
Once you have selected the desired filter - which is A5 from the Anime category in the below example - apply it to the clip or multiple videos you have to edit.

If you have multiple clips, you can add different filters in each or apply one filter to all videos by clicking on the ”Apply to all” option. This one-click will help you in adding a filter in just a click. However, make sure that you preview the video after including the filter in it.
![]()
In case, you want to explore more stunning filters, select “Materials” and choose more options from it.
Step No. 3: Adjust the Alpha Opacity of the Filter and Add the Filter to Your Favorites
You can change the transparency of the filters. With the help of the 0-100 value transparency scale, you can either increase or decrease the transparency of the filter. Move the cursor according to your choice and the filter will set as per your requirement.
In addition to adjusting the opacity, one can also add the filter to their favorites list. The application helps create your own favorite list of filters which you can use later for other videos or photos.
Simply long-press the desired filter, and it will be in your favorite filters’ directory. The next time you edit your videos, apply that favorite effect selecting it from the list.
The favorite icon is represented by a heart symbol as shown in the screenshot below.
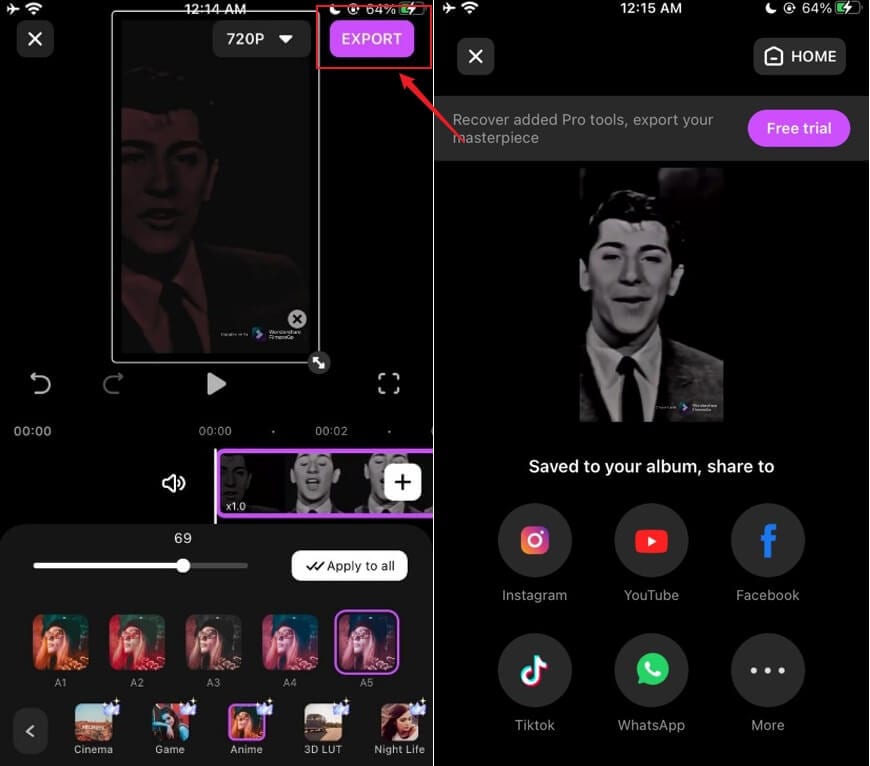
Step No. 4: Export the Video
Once you have added the filters, preview it and hit the “Export” icon if you are satisfied with the result. After the video is exported, it will be saved in your album.
You can also share the video clip on your social media platform. The “Export” option at the top right corner will help you do this step with ease.
Download the Wondershare FilmoraGo application today to add such cool filters to your videos and make your clips stand out from the crowd.
You may also like: 2 Ways to add a black and white filter to video on FilmoraGo

