Apply Filters to Videos: How to put a filter to video on iPhone/iPad
There’s hardly any video shot that doesn’t need you to add a video filter.
Video filters refine a video. To apply filters to videos is similar to icing a cake.
The beauty of the cake lies in the icing design.
The same way the glamour and charm of a video lie in the great hands of a good video filter editor.
To add video filter to videos might seem easy to execute but in actual truth, executing it easily doesn’t work for all video filter apps.
Just the way it takes the right tool to carve out the right icing design, the same way it takes the right video editor to apply a filter to videos.
However, is getting the right video editor enough for a stunning video? Partly yes.
But knowing how to skillfully add video filters is the key to a stunning video.
A recommended video editor to apply a filter to videos is FilmoraGo and this article covers the steps on how to apply put a filter on a video effortlessly on your iPhone and iPad devices.
Read on
Steps to apply filters to video on iPhone using FilmoraGo
FilmoraGo is an easy-to-use video editing application equipped with advanced features and powerful editing tools to get you creative.
Music videos, movies, and every visual entertaining content can be captured and edited using FilmoraGo.
One of FilmoraGo's editing expertise lies in its hundreds of aesthetic-free filters.
Be rest assured that these filters are free to apply to your videos.
The steps to add a video filter are:
Step 1: Install FilmoraGo from the App store.
every beautiful moment in life.
Install FilmoraGo Now!


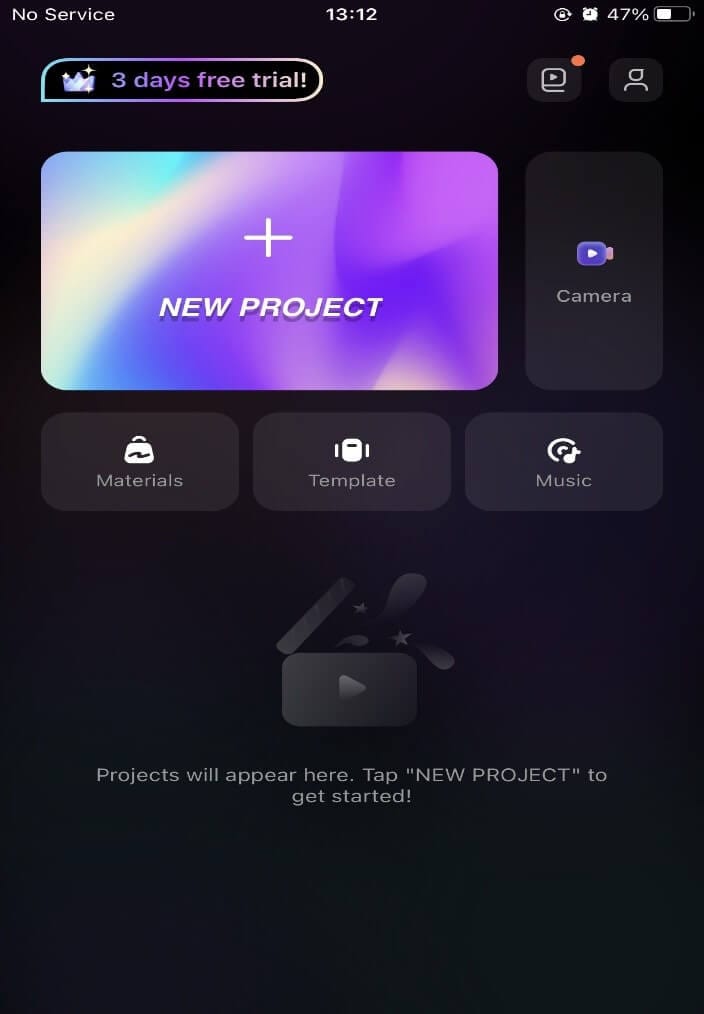
Step 2: Tap on the “new project ” option to begin.
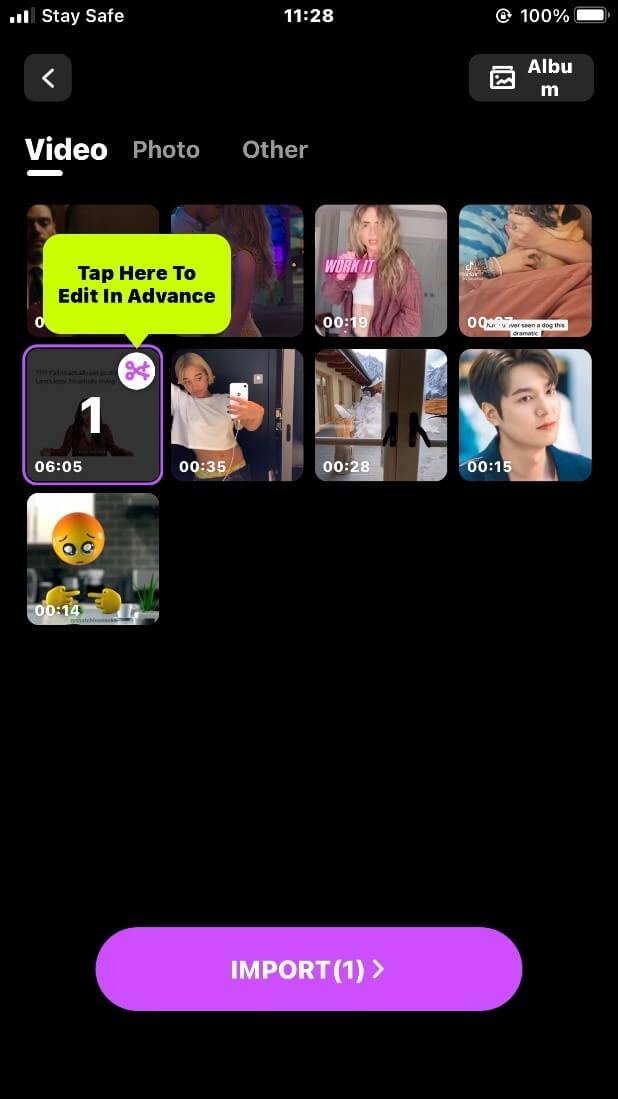
Step 3: Import the video you want to apply a filter to, to the timeline.
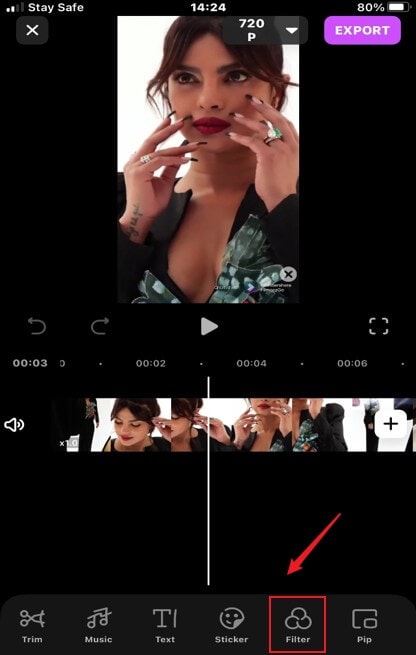
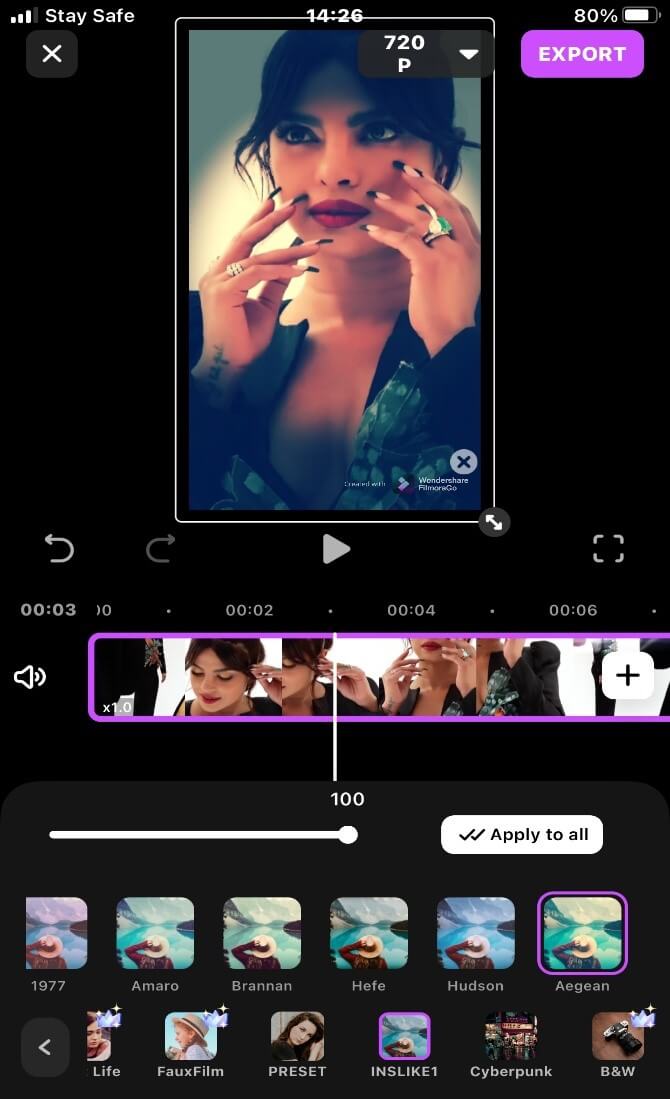
Step 4: Tap on the filter button to access the range of filters.
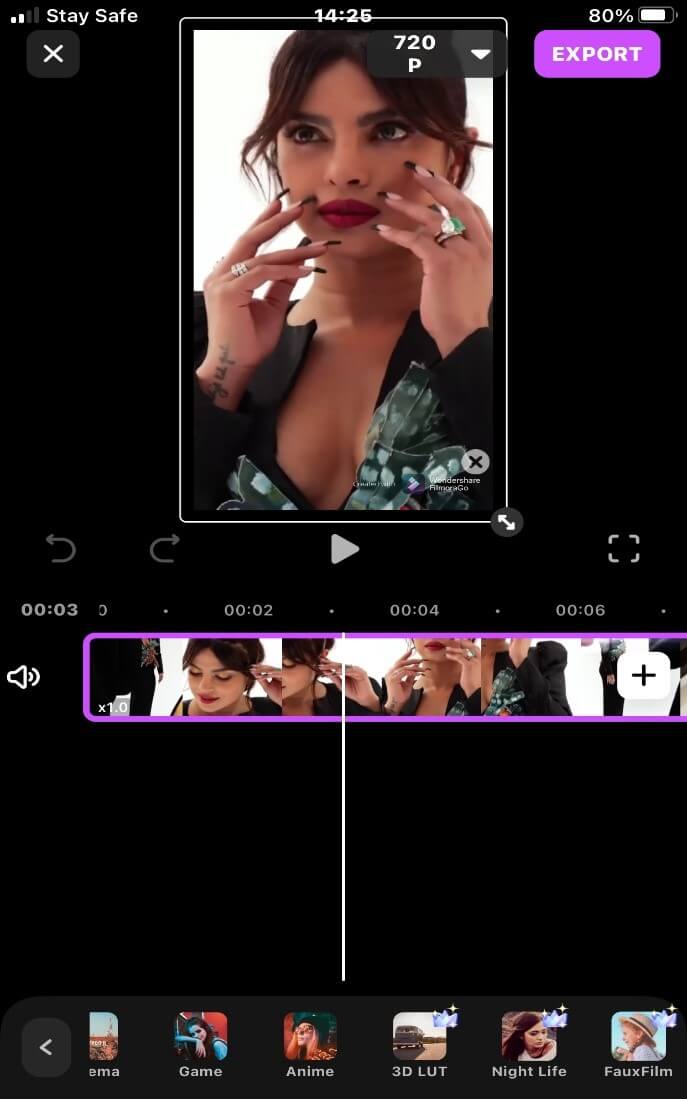
Step 5: Select the filter option that suits you.
For instance, the cinema filter gives your video a Hollywood-like scenery and if you are a lover of anime, you can try out the “anime” filter.
Step 6: Apply the filter to your video.
(You can also adjust the "density" of the filter by dragging the slider)
Step 7: Tap on export to share and save your video.
Steps to add video filter on iPad
Step 1: Install FilmoraGo from the App store.
every beautiful moment in life.
Install FilmoraGo Now!
Step 2: Tap on the “new project ” option to begin.

Step 3: Import the video you want to apply a filter to, to the timeline.

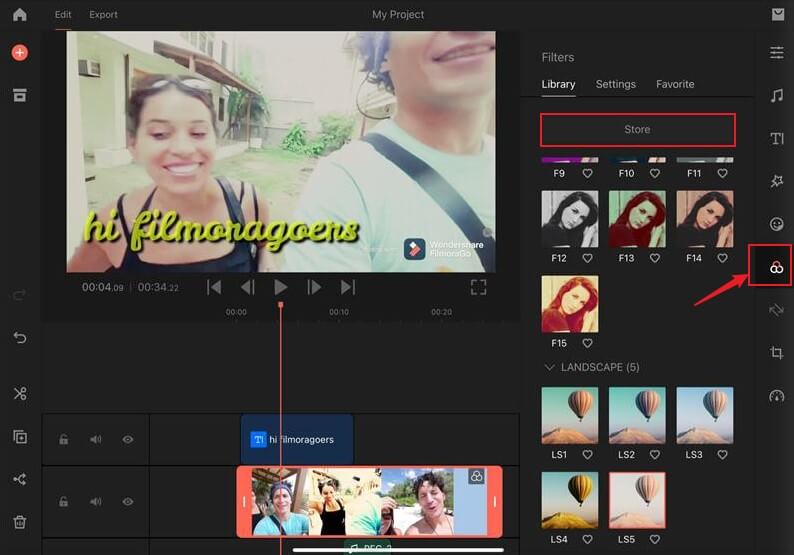
Step 4: Tap on the filter button to access the range of filters.
![]()
Step 5: Select the filter option that suits you.
For instance, the LANDSCAPE filter gives your video a Hollywood-like scenery and if you are a lover of anime, you can try out the “LANDSCAPE” filter.
(If you can’t find this filter, you can click the ‘store’ button to view more filters)
Step 6: Adjust the parameters of the basic color through the ‘setting’ button
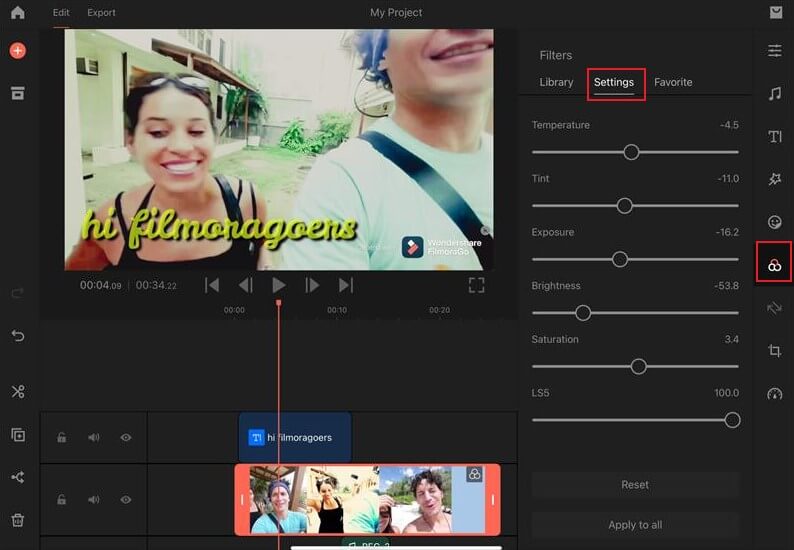
Step 7: Tap on export to share and save your video.
![]()
Conclusion
Learning how to put a filter on a video doesn’t need a filter encyclopedia once you are versed with simple video editors like FilmoraGo.
A bonus of using FilmoraGo filters is there limitless, you could never get enough of exploring the numerous filter presets in the app.
You could create more videos and explore more filters for a movie-like effect.
A creative way of using the filter preset is making a split screen using the PiP function and inserting different filters to each video clip on the screen.
FilmoraGo functions are infinite and also free to use. The first step to creating a blockbuster movie-like video is getting the video editor.
Hence why you should head to the app store and download FilmoraGo on your iOS devices.
You may also like: How to Shorten a Video on iPhone [Two Methods]

